Friday, January 27, 2012

Eyeglass Necklace


About 3 years ago I noticed that my reading vision was starting to blur - I kept doing the age-old trick where you hold out your book further and further, then my arms weren't long enough so I went in and got my eyes checked. Yep, Presbyopia, the old-age reading vision issue. I was 46 at the time so I guess I can't complain too much as I've had perfect vision my whole life. Anyway, being a crafter I find that I am in and out of my reading glasses all day long and I can't ever remember where I set the darn things!!

I decided to whip out a necklace that I could wear around my neck during the day that would hold my glasses. I saw some in the eye doctor's office but figured I could make one myself that I like a lot better without having to spend $20.

Here is how I made mine:

Used a standard gauge (4.5mm) knitting machine
Did an e-wrap cast-on on 3 needles.
Tension was at 3
Used lightest weight sock yarn that I had - it was a small little wad of leftover.
Knit 300 rows
This of course created "I-cord". The 300 rows netted approx. 36" in length.
Bound of my 3 stitches, then I centered a silver ring (purchased a pack of these at Micheals) and looped it through, then knotted the end at a length I liked.
The sock yarn I used was self-striping and because I was only knitting on 3 stitches it had a very different look. I really like my new eyeglass necklace because it is thin I-cord, lightweight, and does the trick nicely. I know it is a simple thing but just thought I'd share the idea. I am going to make several to give away to friends. Only took a few minutes to make.
If you don't own a knitting machine, the same thing could be accomplished with one of the little I-cord knitters that Bond America makes (called Embellish-Knit). Here is their link:
http://www.bond-america.com/products/embellish-knit.html

You could also hand-knit a long I-cord, but whew, that would take some time.
Now I have my glasses with me at all times. :)

Back to Pattern Index


I'm a Craftsy Designer

Thursday, December 1, 2011

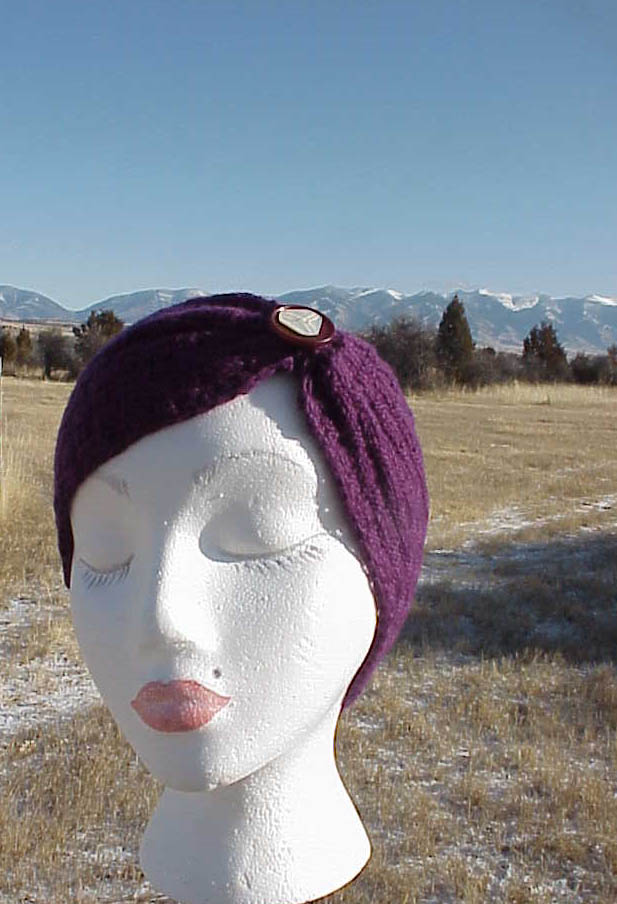
Machine Knit Head Band/Neck Cowl


Here is what I just got done making for a craft show this weekend. Head Band/Neck Cowl. You can wear these on your head (covering your ears) for warmth OR you can wear them around your neck. I was inspired by a free Hand-Knit pattern that I saw online.

Here is how I made mine:
Using my KH-965i, I used my Garter Carriage, chose a pattern (many will do), cast on 34 sts with waste yarn and 3 strands of 2/24, tension 7++.
Set your carriage to knit 182 rows.
Pick up stitches from the first row and rehang onto stitches. Bind off.
You now have a circular band. I then did the cinching simply by wrapping a strand of yarn around about 8 or 9 times. I then chose some funky buttons to sew on.
You don't HAVE to use a garter carriage or even an electric knitting machine. Basically you just have to knit a band approx. 5" wide X 23" Long (when slightly stretched).

I also made some using sock yarn but cast on 40 sts instead and knit 194 rows. Self striping yarn works up really neat for these!

Back to Pattern Index

Saturday, November 26, 2011

New Crochet Slipper Pattern! "Options"


I have been at it again with the whole "options" thing! The knit version of the Options Slippers has gone over so well that I decided to do a crocheted version. Not only are they cute but they are just about the fastest things I've ever made.
The Options that you get with this pattern are that you can choose to:
1. crochet the whole slipper, which is done flat, then folded and either stitched or crochet together.
OR
2. you can crochet the tops, then use a sole that you cut out of a pre-felted sweater. Talk about fast!
I crochet kind of fast perhaps, but I can make one slipper (all-crochet) in about an hour.
My pattern include full written instructions, pictures, hints & tips, and my top-secret (shhhh...) method for making you slippers non skid.

Here is the link to the pattern: LINK
I'm a Craftsy Designer

Thursday, November 10, 2011

New way to make crochet purse straps!

I had made a purse several years ago, it was a flukey thing. I intended to start a crocheted beanie hat when it occurred to me that it was going to end up being huge because the yarn I'd chosen was bulky and I wasn't using a pattern just going along freestyle. I decided to keep going and make a purse! The off-white with rust is that purse. I found a nifty snap & leather closure for it that I LOVE! -wish I could remember where I got it from. sigh. Anyway, every time I carry this purse people give me good comments about it. Decided I should make a few more. I made one larger and one smaller. I used black store-bought handles for the smaller one, not too crazy about them. On the larger bag I made my own handles which is what I am going to tell you about:

Using Bulky yarn I chained double the length of the strap I wanted. I then hdc across the chain. Then fold the whole thing in half and join the two ends. Just stitch them together the best and flattest that you can, weave in ends.
Next make sure that when you have it folded in half that the stitched edges are in the middle, not at either end. (see my lame drawing).

Now you will begin to sc around the doubled length. Start about 1 1/2" from the end and end leaving about 1 1/2". Make sure you tie off and weave in your end when you are done sc-ing. Make a second one to match.
To make it super secure I then did a running stitch from end to end, maybe it was because it was black but you couldn't even see it. I hope I have explained this well enough to help someone else make this strap.


I'm a Craftsy Designer

Tuesday, November 1, 2011

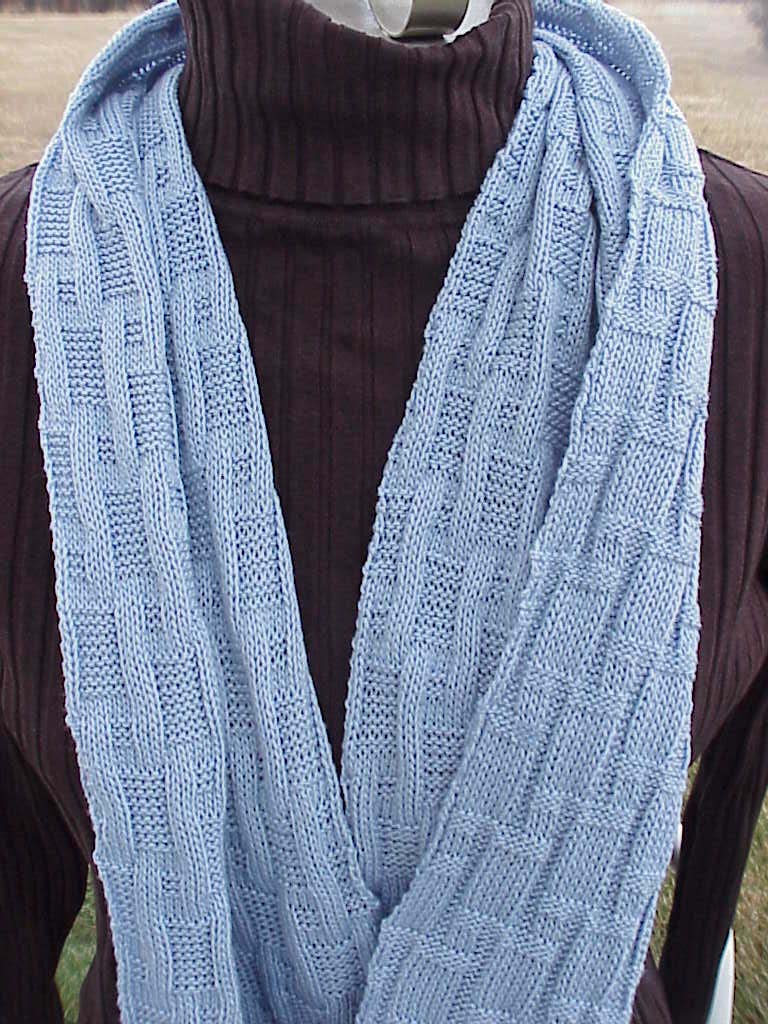
Machine Knit Cowl


So the other night we were all out for a family dinner, my niece gave her sister a birthday gift which was a knitted cowl. It was a very nice red knitted cowl - very simple for us MK'rs. I decided to throw one on my standard gauge knitting machine last night and use my garter carriage to knit it.
Here is how I did this one:
T7
76 stitches
Using Knitking "Panache" cone yarn. I got about 9sts to the inch. (don't know the weight as the cone didn't say)
Pattern #539 on my KH-965i
I cast on with waste yarn, then knit 500 rows. After the last row was knit I picked up the cast on row and hung it on the working needles. I then knit tog. and cast off. I then lightly steamed it with my steamer.
I really like the cowl! It started snowing here in Montana minutes after I took the pictures so I guess I'll NEED to wear it soon!

Back to Pattern Index

Thursday, October 27, 2011

New Kids/Toddlers Slipper pattern "Options"


I had a bunch of requests to write my "Options Slippers" for Kids & Toddlers. So I did!

I love the way these kids one's turn out. The pattern is written for sizes 6mo-12yr.

If you are interested,here is the link to the pattern: HERE

Sunday, October 16, 2011

Breast Cancer Survivor Slippers

I made these slippers for my friend who is soon-to-be a Breast Cancer Survivor. I used Bernat Satin yarn, color is called "Seashell Pink", it took 1 full skein (163 yds) and another 25 yds from a second skein.
The pattern is my "options" slippers where you can choose how you make the soles. I knit the tops, crocheted the bottoms.
The little pink ribbons were just some leftover stash yarn that I had. I used a size F crochet hook, ch 30, turn, slip st in 2nd ch and each ch across. tie off.
I then sewed the ribbon to the tops of the slippers.
I am pleased with how they turned out. We have a cancer center up at the hospital where my mother volunteers, I may make a few more pairs of these and donate them.